How to Record Musical Instruments at Home: A Complete Guide
- 1. Why Record Musical Instruments at Home?
- 2. Setting Up Your Home Studio for Music Recording
- 3. Essential Equipment for Recording Musical Instruments at Home
- 4. Best Practices for Recording Musical Instruments at Home
- 5. Editing and Mixing Your Music
- 6. Real-Life Example: How I Recorded My First Song at Home
1. Why Record Musical Instruments at Home?
In today’s world of music production, recording at home has become more accessible and affordable than ever before. As someone who started recording music at home years ago, I can personally vouch for how satisfying and cost-effective it is. Gone are the days when you needed to rent expensive studio time or hire professionals for every step of the process. With just a few key pieces of equipment and a little bit of knowledge, anyone can start recording their musical instruments from the comfort of their home.
Recording at home offers several advantages. First, it’s incredibly convenient. You can work at your own pace, experiment with different sounds, and record multiple takes without the pressure of studio time constraints. Second, it’s cost-effective. Setting up a home recording studio might seem like a significant investment upfront, but it’s much cheaper than paying for studio time in the long run. Plus, you have complete control over your recordings, allowing you to make artistic decisions without external pressure.
2. Setting Up Your Home Studio for Music Recording
Before you start recording, it’s important to create a space that is conducive to high-quality sound. You don’t need a professional studio, but there are a few key factors to consider when setting up your home recording space. Here are the steps I followed to set up my own home studio:
- Choose the Right Room: Ideally, select a room that has minimal external noise and a relatively controlled acoustic environment. Rooms with carpeting, curtains, and soft furniture tend to reduce sound reflections, creating a better recording space.
- Acoustic Treatment: Adding some basic acoustic treatment can significantly improve your recording quality. I used foam panels and bass traps in the corners to reduce unwanted reflections and reverb.
- Organize Your Space: Keep your space clutter-free and arrange your equipment in a way that allows you to easily move between instruments, your computer, and other gear. Having a dedicated desk or table for your gear can help streamline your workflow.
Once you’ve got the basics of the room setup, it’s time to think about the actual recording process. Let’s dive into the essential equipment needed to get started with recording musical instruments at home.
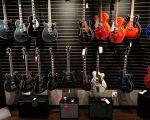
3. Essential Equipment for Recording Musical Instruments at Home
When I first started recording music at home, I made the mistake of thinking I could get away with using basic or low-cost equipment. While some inexpensive gear may suffice for basic demos, investing in quality equipment is crucial if you want to produce professional-sounding recordings. Here’s the essential gear you’ll need to get started:
- Audio Interface: An audio interface connects your instruments (and microphones) to your computer. This is the core of any home recording setup. I recommend the Focusrite Scarlett series or the PreSonus AudioBox as affordable and high-quality options.
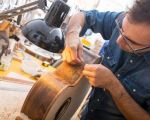
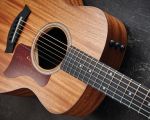
- Microphones: Depending on the instrument you’re recording, you’ll need the right microphone. For vocals, a large-diaphragm condenser mic like the Audio-Technica AT2020 is a great choice. For instruments like acoustic guitars, you might want to use a small-diaphragm condenser mic or even a ribbon mic.
- Headphones: A good pair of closed-back headphones is essential for monitoring your recordings. I use the Sony MDR-7506, which provides excellent sound isolation and accuracy.
- DAW (Digital Audio Workstation): Your DAW is where the magic happens. It’s the software used for recording, editing, and mixing. I personally recommend using Ableton Live or Logic Pro X for their user-friendly interfaces and robust features.
- Monitors: While headphones are great for monitoring, a pair of studio monitors (speakers) will give you a more accurate representation of your mix. Brands like KRK and JBL offer affordable options that deliver solid performance.
Once you have your equipment in place, you're ready to start recording your musical instruments. But how do you ensure that your recordings sound professional? Let’s look at some best practices for capturing the best sound.
4. Best Practices for Recording Musical Instruments at Home
Recording music at home can be a bit tricky if you're not familiar with the techniques involved. However, with a little practice and some simple tips, you can get great results. Below are a few best practices that I’ve followed to improve the quality of my home recordings:
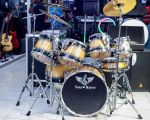
- Proper Mic Placement: Microphone placement is key to capturing the best sound. For guitars, I recommend experimenting with placing the mic slightly off-center from the sound hole for a balanced tone. For drums, overhead mics placed above the kit can capture the full range of sound.
- Use of Multiple Takes: Don’t be afraid to record several takes of the same track. Often, the magic happens when you combine the best parts of multiple takes, so be patient and take your time.
- Keep Tracks Organized: As you record more instruments, your session will get more complex. It’s crucial to keep your tracks labeled and organized so that you don’t lose track of your work. I recommend creating separate tracks for each instrument and group similar instruments together.
- Test Your Levels: Always test your levels before hitting the record button. You want to avoid clipping, which can distort your sound, so aim for a healthy level around -6 dB to -3 dB on your DAW.
These tips can help you create clean, professional-sounding recordings without needing a big studio setup. The key is patience and experimenting to find what works best for you and your instruments.
5. Editing and Mixing Your Music
Once you’ve recorded your tracks, the next step is editing and mixing. This is where you can really bring your music to life. I’ve spent countless hours editing my recordings, and it’s truly an art form. Here’s how I approach the mixing process:
- Clean Up the Tracks: Start by trimming any unnecessary silence or noise from your recordings. This can be especially important for instruments like drums or bass, where unwanted noise can muddy the mix.
- Balance the Levels: In the mixing process, balance the volume levels of your tracks. For instance, make sure your vocals are clear and sitting comfortably over the instrumental tracks, without overpowering them.
- Apply EQ and Compression: EQ (Equalization) helps you shape the tone of each instrument, while compression can smooth out the dynamic range and make everything sit together better. These tools are essential for achieving a polished sound.
- Use Effects and Automation: Adding reverb, delay, or other effects can add depth and dimension to your mix. Automation allows you to control levels or effects over time, giving your track movement and interest.
Mixing can be the most time-consuming part of recording, but it’s also the most rewarding. With practice, you’ll learn how to get everything to sound cohesive and dynamic, just like a professional recording.
6. Real-Life Example: How I Recorded My First Song at Home
When I first started recording at home, I was overwhelmed by the process. However, after setting up a simple home studio and following some of the steps I’ve shared, I was able to record my first song entirely on my own. It was a learning process, with a lot of trial and error, but the result was something I was truly proud of.
Using a simple condenser mic, an audio interface, and a DAW, I recorded the vocals and guitar. I spent hours fine-tuning the levels, adding effects, and learning how to use EQ. The process was frustrating at times, but the moment I heard the final mix, it all paid off. Now, I continue to record from home, improving my skills with each project.
Recording musical instruments at home can be incredibly rewarding, and with the right tools and knowledge, anyone can create great-sounding music without a big-budget studio. Whether you're a beginner or experienced musician, I encourage you to start experimenting and see where your creativity takes you!